My Cradle Mountain trip, April 2018

(Note: few more, images to come, just doing a little tweaking)

DSCF5965@1112

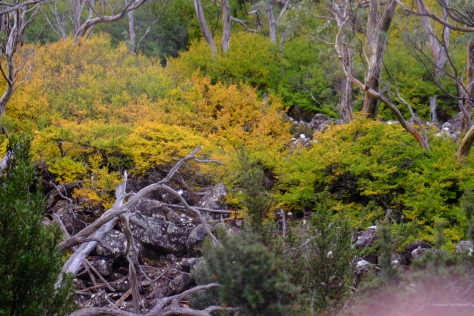
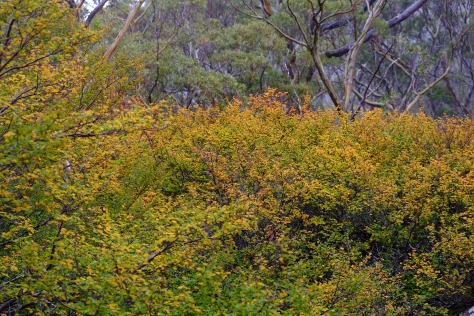
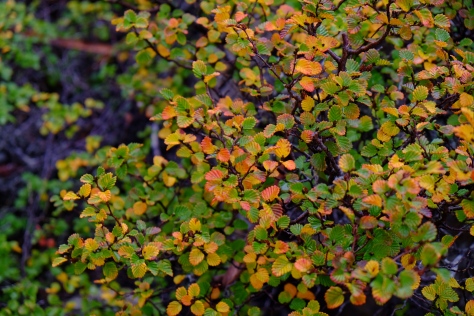
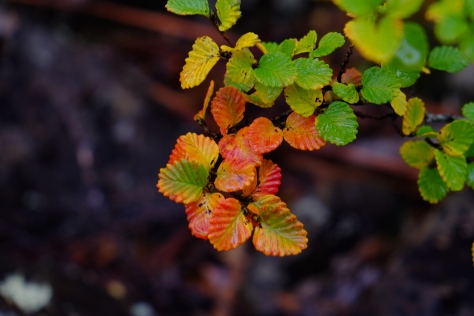
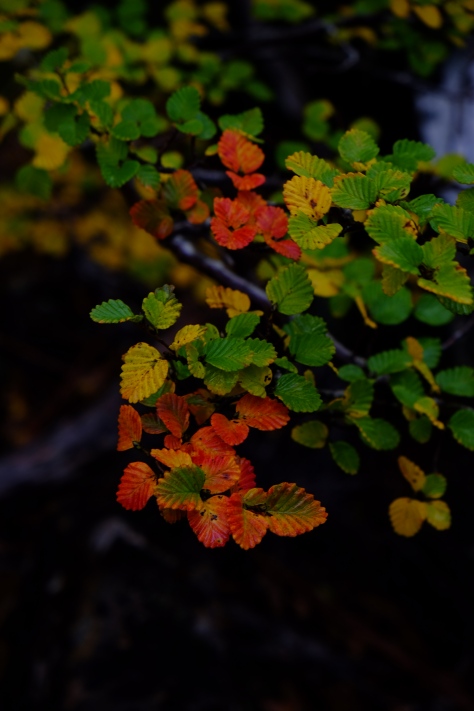
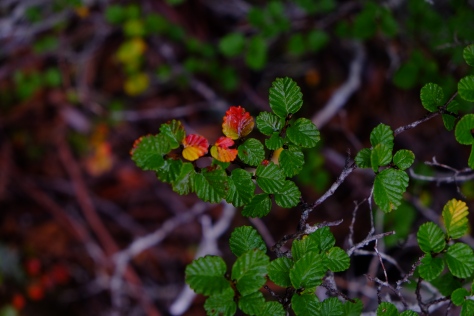
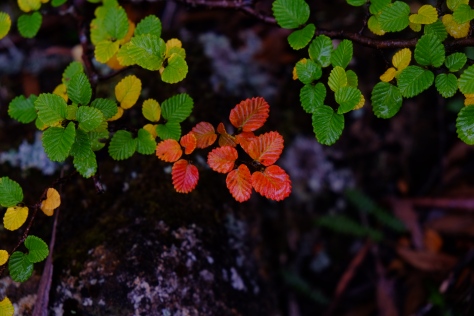
Well, this trip started out as a desire to see the fagus at Cradle Mountain, but frankly, it was disappointing. I’d rather go to Lake Fenton. Only yellow and slight orange, and mostly at a distance.

DSCF0268 fagus southern end dove lake

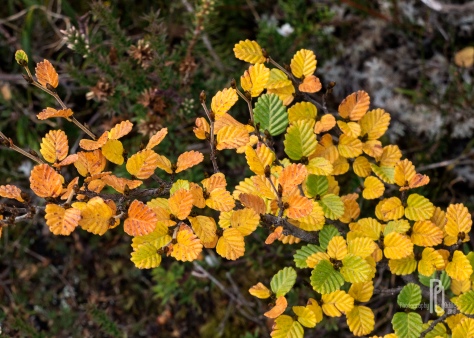
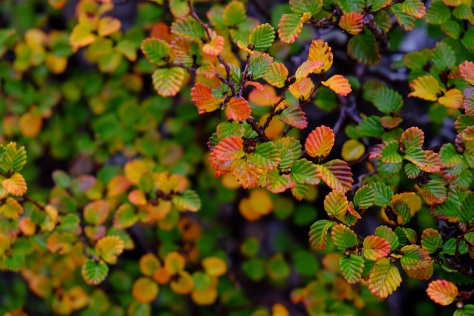
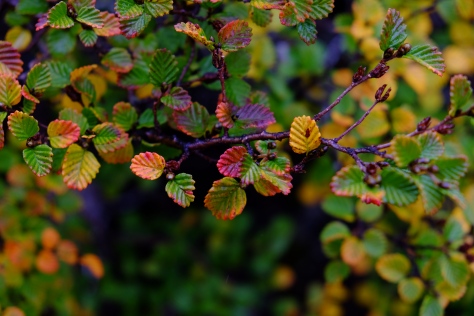
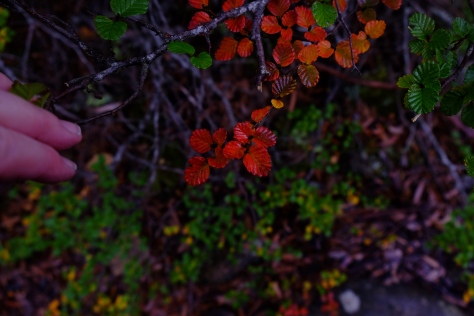
The few spots we could get close up were lovely, though, at the end of the Lake near the Ballroom Forest there is a stand you walk through.  My friend Gail and I had booked for 3 nights at the Waldheim Cabins, the only in-park accommodation, just 2km from Dove Lake.  (I did find out later that this was a ‘bad’ year colour wise, it never got much past overall orange, with just individual leaves and small ‘sprigs’ turning red.)
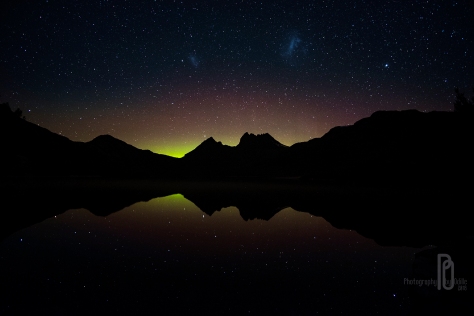
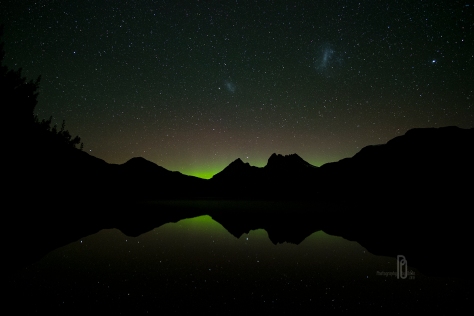
But I did get a BIG bonus – an Aurora the night of 20 April!

Day 1.
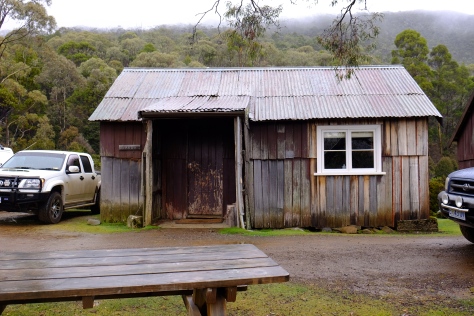
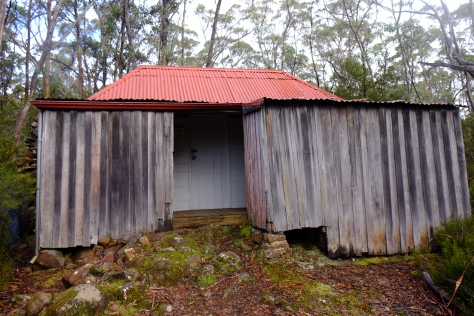
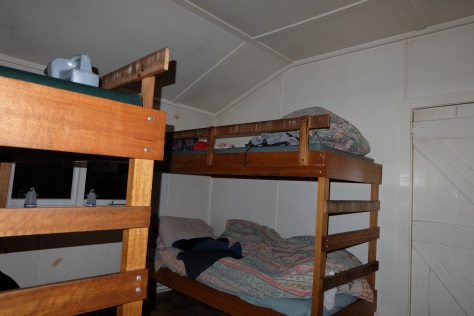
We drove up on Wednesday 18th April, a long and tiring drive but it was nice to see some other areas of Tassie. We arrived about 3.30pm. naturally there was no internet coverage at the cabins, which are delightful and much better than we expected, each bunk even has a bedlamp. If you’re planning a stay there, one thing to note is that the bunk beds are NARROW! You have too be careful turning over or all the bedclothes side off. (I can’t bear sleeping bags because I move my feet a lot when asleep and they make me claustrophobic.) You do not need a lot of bedding, the cabins are not too cold. I had one doona and a knee rug on my feet that I kicked off the first night as it was too hot.

car at aramina DSCF5702
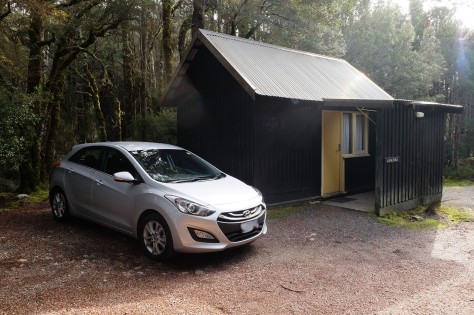
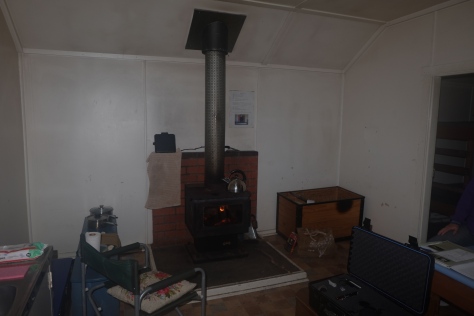
There is a full electric oven, a very efficient electric heater set on a programme, sink with cold water (note NOT potable without boiling 3 times – we took a 20litre bottle), and excellent cutlery, crockery and utensil selection, plus cleaning stuff and a tea towel. Our 4 bunk cabin, Aramina, was right opposite the top ablutions block, and the ablutions have HOT water. All in all, truly excellent. Also note the 4 bunk cabins are fine for 2, as we used the spare top bunks for our gear, but there’s not much room for gear if there were 4 of you!
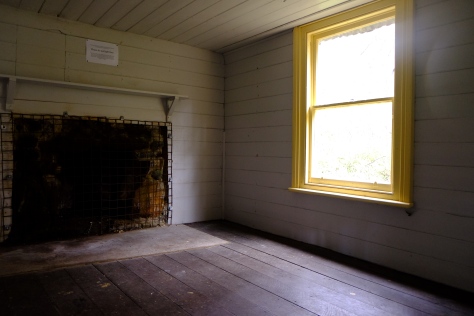
The cabins are right at the edge of the Waldheim Forest, this was the view out over the kitchen sink.

BEHIND THE HUTS

We saw the resident pademelon soon after arrival, he seems to do his rounds at the same times each day, and very much appreciated a few left over raspberries at the end of our stay.
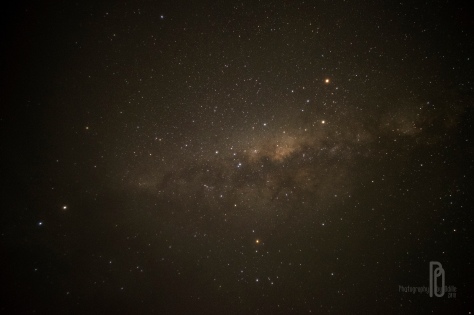
At the end of the lane into the cabins there is a turning circle, and it is also an excellent spot for over head shots of the stars at night, being fairly level and with trees not too close, although they block low stars to the west.
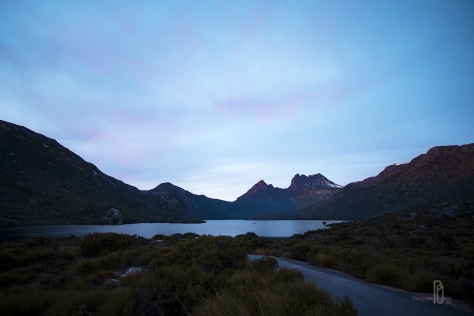
On Wednesday evening I zipped up to the lake and shot a couple of pics just with my iPad, those are already on my timeline.

Day 2.
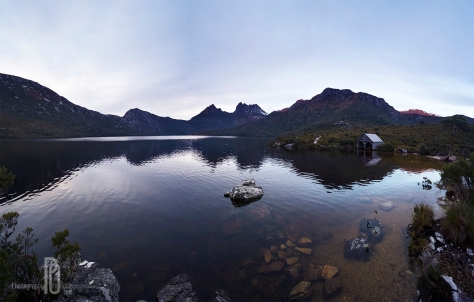
On Thursday morning (19/04) I was up at 04:30 and went down to Dove Lake to try for some star shots, and was hoping for a good sunrise. The stars cooperated but the sunrise didn’t. I walked on to the Boat Shed but it was a bit disappointing.

stars pre-dawn 19042018DSCF5630

sunrise 19042018DSCF5651boat house pano 19042018

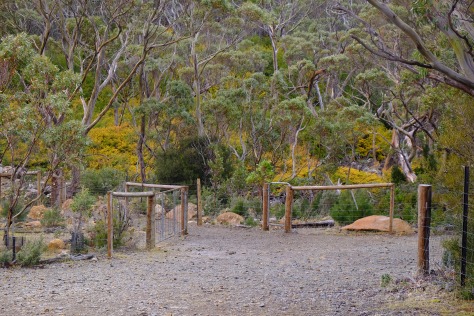
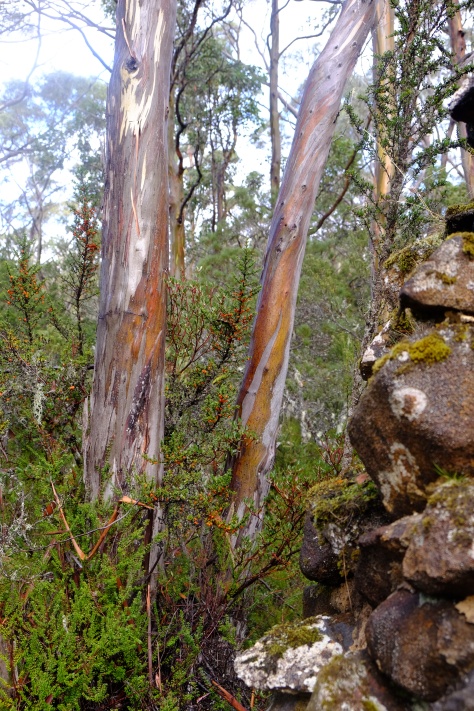
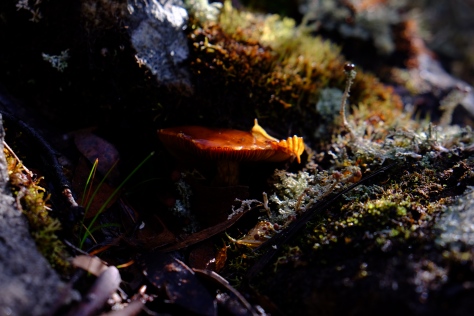
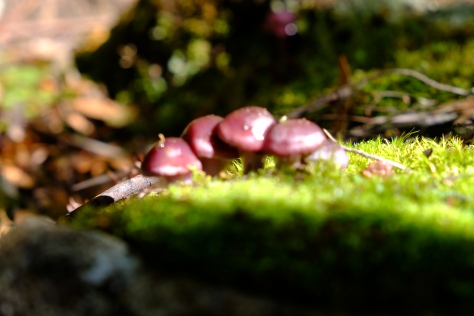
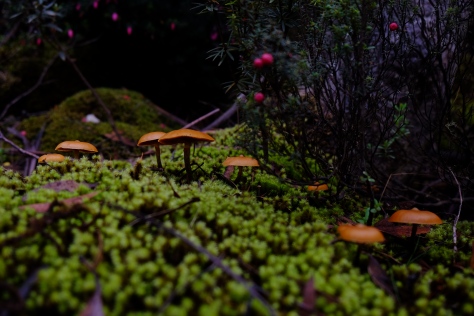
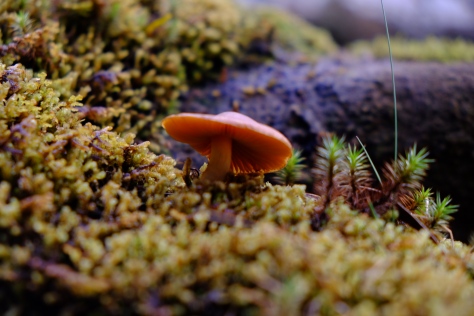
I came back to our cabin and we decided to do the short Waldheim Forest Walk, which is enchanting through the very old growth beech forest. The light was just lovely.


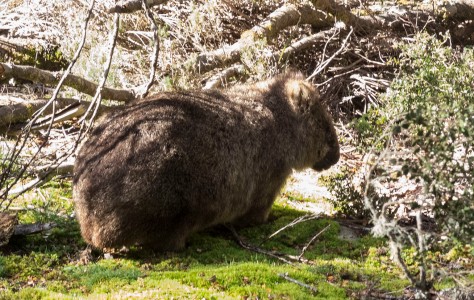
About 11:00 we set off for the Dove lake circuit hike, and on the way we saw a young wombat cross the road right in front of us, eliciting a stop and a good posing and back scratching session – thank you Wombat, and some nice shots.

wombat 1 DSCF0192

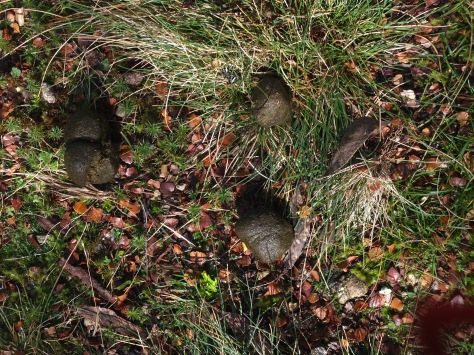
And for those who doubt that wombats do square poo – they do!

square poo

At 11.30 we arrived down at Dove Lake and set off, anti clockwise, on the circuit. This was a plot to stop me being too tired when I arrived at the Ballroom Forest. Huh!
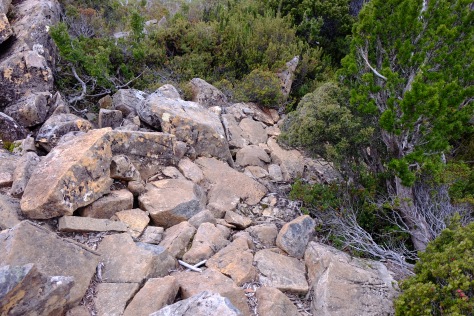
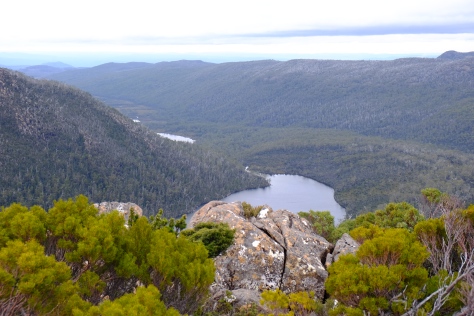
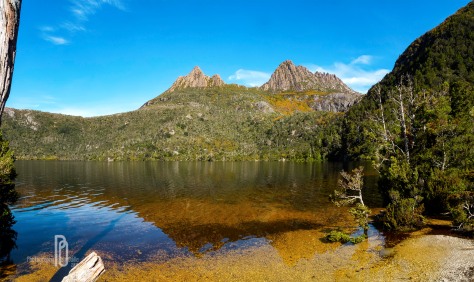
Now the Day Walks map and brochure – for which I paid $6.95! – states this is a Grade 2 walk, gently undulating with some steps. Well, I would class it as a Grade D bastard of a track with great long flights of steps interspersed with a few short flat bits. By the time we got to the seats just to the north of the Ballroom Forest I was, frankly, knackered. We sat on the one near the water and had some of our lunch before pressing on.  I did get this nice 2 shot pano from there.  And I also realised you can kayak or canoe to that end of the lake and get out here for some short walks – Ah-hah!  Definitely will be keeping that fact in mind for next time.

pano southern end dove lake copy
I did dip into the Ballroom Forest area, and I know there is a waterfall in there, but I was too tired and literally stumbling about to do it any sort of justice.

It took us nearly 6 hours to complete the ‘2 hour easy walk’ circuit, and frankly, I thought they’d be bringing me out on a stretcher, and I am not joking. I had asked so many people, and I asked again at the centre when we booked in, and all the advice was that it was an OK walk, not hard. Well, this poor old duck found it challenging in the extreme and I do not know how I made it back to the car. If I’d had to drive back the length of the Dove Lake road to the accommodation there is no way I could have done it, I was physically and mentally drained. I had a hot shower but was too tired to eat and went straight to bed, after medications of wine and painkillers.

Day 3
As you can imagine, I slept well! Woke about 6am, very late for me, and groaned my way over to the ablutions. Everything hurt, I made liberal use of voltaren gel and paracetamol and we had a quiet day. Drove down to the Visitor Centre cafe to internet (but I forgot to check the aurora page!) and use our phones, had a coffee there. We had a poke round there and the Pepper’s shop on the way back, and had some lunch back at our cabin.
In the afternoon we did a kms or so amble along the Roony Creek walk and saw SEVEN wombats – no platypussies though, Gail was most disappointed.

I went to bed about 7.30pm and woke at 2200 with ‘the needle’. Something was saying get up and get out there. I went down to the clearing at the end of the cabins and did a test shot south. Took a few star shots, looked south and thought that surely that was auroral activity I was seeing. Drove down to the lake, and while I had missed the best of it I did get an aurora reflected in Dove Lake with the mountains in the background, and stars reflected too. So I was well pleased.

DSCF5931@1147

Day 4.
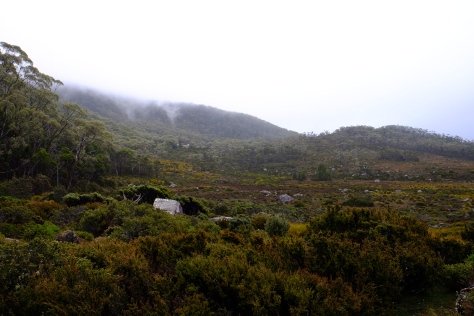
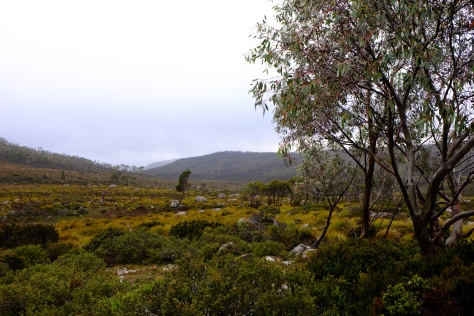
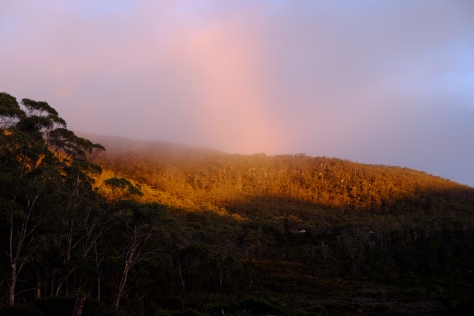
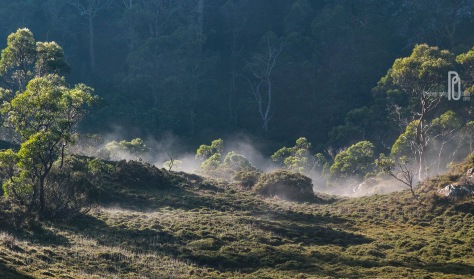
Was clean up, clear out and do the long drive home.  But the area turned on some lovely mist rising scenes for us.

sat am mist rising DSCF0298

2017 AWBF Parade of Sail

I went down for the Australian Wooden Boat Festival Parade of Sail, all images shot from Long Beach at Sandy Bay, Hobart, Tasmania. Photos are in time order – more to come as I have time to edit them.  I will be putting selected images up on my RedBubble shop pages.

I had a great time paddling in the water while taking these – it was a warm to hot day and I just couldn’t resist when I got down there, off went the shoes and socks and rolled up the pants legs (they got wet anyway) and had fun!

beach-pano-1
Beach pano looking back along Long Beach – which is just below the Sandy Bay Sailing Club – towards Hobart city and the casino (out of sight to the left) at the end of the sail past.

At one stage I could hear the faint but unmistakable sound of bagpipes – I think it was coming from the James Craig but it was hard to tell.

About the Festival.

The award-winning MyState Australian Wooden Boat Festival, an exciting celebration of our nation’s rich maritime culture and one of the world’s most anticipated maritime events.  Held every second year in Hobart, the capital of Tasmania, a city rich in marine heritage.

Held across Hobart’s vibrant and bustling waterfront, the four-day festival brings together the largest and most beautiful collection of wooden boats in the southern hemisphere. From its humble beginnings in 1994, it has grown to become the most significant event of its kind in Australia.

Along with the exhibition of these beautiful boats, the festival delivers a lively combination of incredible local food, live entertainment, music, demonstrations and displays, and of course the wonderful display of classic and modern wooden boats across the waterfront.

All shots with Fuji X-T1 and Fujinon XC 50-230 lens. Unfortunately I somehow put a big smeary fingerprint on the lens about halfway through the session, which is why some of them have a misty patch. Sorry folks!

dscf3929-form-up
Forming up, with spectator
dscf3949-seagull
Seagull with something he plucked from the water, good test of the focussing speed on ‘Continuous’ focus. Not too shabby for a kit lens.
dscf3982-kayaker
A lone kayaker – possibly from the tawe nunnugah rowing event. I’m very impressed – it must be a pretty hard slog! “tawe nunnugah” means “going” by “canoe” in the local Aboriginal language. The event took the name to honor the first navigators of southern Tasmanian waters. Every two years keen adventurers set off from Recherche Bay in the far south of Tasmania to row and sail to Hobart, more than 100 nautical miles away, in a fleet of small boats. This expedition over 10 days takes participants along some of Tasmania’s beautiful and unique coastline, from the wild south and along the spectacular and historic D’Entrecasteux Channel and up the Huon River before entering the Derwent River to Hobart. This arrival coincides with the start of the Australian Wooden Boat Festival. http://lbt.rforster.org/home
dscf3984-tall-deakin
The brigantine Windeward Bound, based in Hobart. http://www.windewardbound.com.au/xp52o0ghhdji0as6acelr4xccgj0wf
dscf3998-boat-bridge
I just liked the image of one yacht with the bridge arch behind it.
dscf4006-young-endeavour
Young Endeavour Young Endeavour was a gift from the United Kingdom to the Government and people of Australia to mark the Bicentenary in 1988 Construction began on the ship in May 1986 in Lowestoft, England and on 3 August 1987 she began the long voyage to Australia with a crew which included 24 young people from Britain and Australia. The official handover ceremony took place on 25 January 1988 in the presence of their Royal Highnesses the Prince and Princess of Wales in Farm Cove, Sydney Harbour. In his acceptance speech, the ship was pledged by the then Prime Minister, Mr Bob Hawke, to serve Australian youth. For a land girt by sea, the ship was a reminder of the maritime heritage shared by the two countries. Her arrival heralded the start of a new era of sail training in Australia. The Government decided that the Royal Australian Navy would operate and maintain the ship, and that the Young Endeavour Youth Scheme would be set up to manage the associated sail training program. The Scheme was established in early 1988 with a Board appointed by and responsible to the Minister for Defence. The Scheme’s management and administration is undertaken by civilian staff, and is based in the ship’s homeport of Sydney. As Australia’s sail training flagship, Young Endeavour participates in major events in Australia and around the world. https://www.youngendeavour.gov.au/
dscf4009-james-craig
Young Endeavour – I loved the contrast of the little, little sailboat and the big, big one.
dscf4011-windeward-bound
Windeward Bound, and an interesting little boat with blue sails. Anyone know type or name?
dscf4012-rowers-seagull
Rowers and seagull
dscf4036-chopper
Chopper – I think he was filming the spectators, as he went sideways right along the stretch of beach I was on, facing landward
dscf4051-tenacious
Tenacious – she was nice and easy to identify 🙂 Tenacious’ is designed by Tony Castro with features not seen on any other boats, including six wheelchair lifts, braille signage, deck ribs and tactile arrows so that the visually impaired can move with confidence, vibrating pads under the bunks as alarms for those that are hearing impaired, even the platforms up the mast are designed to take a wheelchair user to unforseen heights. On the 6th of April 2000 Tenacious was officially named in a ceremony attended by HRH The Duke of York. Tenacious sailed on her maiden voyage 1,548days after her keel was laid, on 1st September 2000 from Southampton to Southampton calling at Sark, St Helier and Weymouth. She has been encouraging self-discovery and cultivating active participation ever since. The supportive and well-designed environment quickly breaks-down prejudice,promotes equality and mutual understanding. It is where people find new strengths and learn to see strengths in others without being diverted by a perceived weakness. The effect is an immersive personal development experience, increasing life skills and self-belief. A voyage with the JST is about joining in and getting involved in all aspects of sailing the ship, regardless of physical ability. Whether you are a tall ship enthusiast, fair-weather sailor or complete beginner – they welcome everyone. For the full story on Tenacious please use the following link – http://jst.org.uk/our-tall-ships/tenacious/
dscf4058-james-craig
James Craig James Craig , launched as Clan Macleod, was built by Bartram, Haswell & Co. in Sunderland, England in1874. Her name was changed to James Craig in 1905. For 26 years she plied the trade routes of the world carrying general cargoes during which period she rounded Cape Horn23 times. In 1900 she was purchased by Mr J J Craig of Auckland, New Zealand,who used her on trans-Tasman trade routes as a general cargo carrier. In 1911she was laid up because increasing competition from steam ships made sailing vessels uneconomical. She was then stripped and used as a copra hulk in New Guinea. After the First World War there was an acute shortage of cargo ships and she was bought by the well-known Australian jam manufacturer, Henry Jones IXL. This gave James Craig a new lease of life after being towed from New Guinea to Sydney for re-fitting. Her return to service was brief because in 1925 she was reduced to a coal hulk at Recherche Bay, Tasmania. In 1932 she was abandoned and became beached after breaking her moorings in a storm. She remained beached until 1972 when volunteers from the Sydney Heritage Fleet re-floated her. In 1973 she was towed to Hobart where temporary repairs were carried out. She was towed to Sydney in1981 and restoration work commenced. James Craig‘s restored hull was re-launched in February 1997. For details and more information go to – http://www.shf.org.au/
dscf4063-young-endeavour
The classic sailing ship portrait. Young Endeavour.
dscf4075-2-smalls-red-sails-dutch
And I haven’t forgotten the small boats, seen here with Tasmania’s own sailing ship, the Lady Nelson, in the background. I love the little red sailed boats I see on the Hobart waterways so often, and this one is beside a small Dutch a traditional gaff rigged Dutch sail boat here for the AWBF.
dscf4085-lady-franklin-and-enterprize
Two tall ships with Tasmanian connections, Lady Nelson, and the brown hulled Enterprize. LADY NELSON Hobart is the home port for the Lady Nelson, a Tasmanian-built replica of the cutter of the same name built for the Royal Navy in 1798. The original ship saw service in New South Wales and in 1803 brought the first settlers to what would become the city of Hobart on in Van Diemen’s Land, now of course Hobart, Tasmania. Our own replica of the Lady Nelson is a 52’ long, 60 ton cutter built in Margate in 1988. The ship is operated by the Tasmanian Sail Training Association for training, adventure cruises and local tours. She is crewed by volunteers. For details and more information go to – http://www.ladynelson.org.au The ship is a replica of the original Enterprize, built in Hobart in 1829, down to the hand-sewn canvas sails and tarred hemp rigging. She is 88’ long, 72 tonnes displacement and boasts a magnificent 2000 square feet of sail. The original Enterprize was chartered by one John Pascoe Fawkner who sailed her from Tasmania to Port Philip Bay and up the Yarra River in August 1835 to found Melbourne. That Enterprize was wrecked in New South Wales in 1847. The current ship was built with traditional methods and launched in Melbourne in 1997, the first square rigged commercial vessel built there in 120 years. For more information on the Enterprize visit http://www.enterprize.org.au
dscf4096-james-craig-bowsprit
So just imagine for a moment it is the late 19th or early 20th century and you are a sailor on the James Craig. There’s a force Ten blowing and the lines up on the bowsprit need atteniton. Up you go, and probably no lifeline of any sort – it would sharpen your grip remarkably, I would imagine. They were brave men who built our world, and I salute them.
dscf4103-julie-burgess
I found it impossibnle to get a shot of the Julie Burgess without other boats in front of her, this is the best I could do. JULIE BURGESS The whole city of Devonport seems to have been involved in one way or another with the two year restoration of the pretty Bass Strait trader Julie Burgess, a 64’ blue gum ketch built in 1936 for the Burgess family. Five generations of this leading Devonport family have owned and operated fishing vessels in the Bass Strait. The 38-ton vessel has a new life as the feature ship of the redeveloped Devonport Maritime Museum. She made her maiden post-restoration debut at the MyState Australian Wooden Boat Festival in 2013. Historic Vessel Number: HV000366 For details and more information go to – bassstraitmaritimecentre.com.au/julie-burgess
dscf4112-mercator-julie-burgess-southern-cross
A gaggle of boats! No name on the front one, the one behind is Mercator, then Julie Burgess (ATS15 on sail), and back right is Southern Cross, another of the featured tall ships. This appears to be the only time I caught her, I don’t think I have her in sail. SOUTHERN CROSS LONDON Launched in 1972 in Buckie, Scotland as a pleasure craft for Major Frederick W. Cunduff, Managing Director of Gardner diesel engines. Being built on the North Sea in the North Sea Buckie, its lines are similar to many of the working boats of that area and era. Southern Cross has circumnavigated the globe at least once, rounded Cape Horn, sailed to the New Zealand Sub Antarctic Islands and cruised the Pacific about 10 times. We don’t know much of the boat’s history in Europe. But it was the fifth Southern Cross that Cunduff owned. This was his downsized version – his previous one was 100’ long and made of steel. It is now on charter in the Med. Southern Cross London went to New Zealand around the mid-eighties, based in Dunedin and owned by the late Alex Black, a prominent figure within Outward Bound. Alex undertook many voyages to the NZ sub Antarctic Islands, South America and Tasmania. Martin Beck bought the boat from Alex in NZ and based her in Hobart, sailing many times with his young family to the South Pacific and finally selling it to the current owners two years ago. The current owner, Braye Sutherland, undertook a year long family cruise of NZ, Tonga, Fiji, Vanuatu and the Australian East Coast in 2014 and have recently put the vessel into Australian 2B Survey to operate multi day cruises in Southern Tasmania under the name Cruise Tasmania. We estimate the boat has travelled something like 150,000 Nautical Miles – about 7 laps of the planet…… For details and more information go to – http://www.cruisetasmania.com.au


A Little Mystery

This week, I was browsing through the Encyclopedia of Cats during an idle moment or three. So here I am, browsing through, and I come to this image by Durer (anyone know the name of it, by the way?) showing Adam and Eve, four cats and the serpent offering the apple to Eve.  However, I cannot find this work even on the complete works site, so it may be by someone of his era, or a modern ‘after the style of’.  However, if it is contemporaneous with Durer (1471 – 1528), it presents a small mystery.

I was about to turn the page when it struck me. One of the cats is POINTED!  Why is this so extraordinary?  Because as far as I know Durer never left Europe, so WHERE did he – or of it is by a contemporary –  see a pointed cat?

First European mention of pointed cats is from 1793 Russia, and that’s still a heck of a long time after Durer (1471-1528).

Anyone have theories?  I have emailed the publishers to ask, but maybe there is someone out there who  can come up with the answer for me.

dscf4741


Aurora Australis, a naked eye v camera view

As I have seen so many questions on Facebook from newbies to aurora viewing ask some variant of the question  “Do you see colour with the naked eye?”, I decided to show some examples.  I have desaturated the colour files, it gives a reasonable idea of what you usually see, although usually somewhat FAINTER than these images show.  In a strong aurora you can see some colour, mostly red or green, but usually fleeting and faint.

The naked eye does not have the dynamic range to see the colours of the weaker auroral events, which is why we use long exposures when shooting with a camera.  Most of these were 15-25 seconds, at high ISO settings.

I hope this is helpful to those wishing to go out to view.  Everyone’s vision is different, too, you may see colour and I may not, or vice versa, even when we are standing side by side.

There are many useful Facebook groups, I have listed them, with links, at the end of this article.

And for an explanation of the aurora and what causes the various phenomena, see good old Wikipedia!

And most importantly – enjoy the show!!

From the top

  1.   Beams are often seen during the aurora, they are ion waves. You will see the beams flicker up, they look like someone shining a torch, and they ‘run along’ in one direction and then back (usually).  Night of 7/8 October 2015.  Mortimer Bay beach, Tasmania

2.  Picket fence or piano keys, night of 7/8 November 2015.  Goat Bluff, Tasmania.  This phenomena was seen of to the west of the normal southern aurora alignment.  The beams were a forerunner to phenomenon now known as STEVE, an abbreviation for Sudden Thermal Emission Velocity Enhancement (formerly though to be a proton arc). The name describes what’s known about the process, which involves a sudden increase in temperature around the region, and a boost in velocity toward the west. As more research comes through it may change its name, but we now know it’s definitely NOT a “proton” arc, and the white amorphous cloud at the top of the picket fences was the beginning of that phenomena.

3.  The STEVE at its height.  The most exciting aurora I have ever seen, I consider myself very privileged to have captured this.

4.  The ‘blob’ event of 19 March 2015.  Blobs occur at an angle to the normal southern oriented aurora – this one was almost due west.  Naked eye it just looked like a funny cloud.  The start was the small blob, then it extended to the long bar.


Then Facebook groups – general ones and state specific.  I have NOT included ‘secret’ groups or ‘Alert Now’ groups, you’ll find links to those on the various pages for your area.

Southern Hemisphere Aurora Group:

(this group offers some very good explanations and forecasts, links to other forecasts, thanks to David Hunter and his team)

Aurora Australis Chasers and Night Photography

Southern Hemisphere Aurora Chasers

If you are in NZ, the Group there is Aurora Australis.  (If you are in Tassie and waiting, a peek here can be good, as they are 2 hours ahead of us, you can see what’s happening and make your move.)

Aurora Australis Tasmania

Aurora Hunters Vistoria

Aurora Australis NSW / ACT

Aurora Hunters NSW, SA and ACT

Aurora Australis Western Australia

Aurora Australis Science

Aurora Hits And Misses

Southern Aurora Hunters North of 35.° S

And on from the northern hemisphere – if they are having action during our day – their night it can be of some use in keeping an eye on what the action id going – strengthening, waning etc.

AUK – Aurora UK

Fagus and Funghi Follies!

DSCF1598
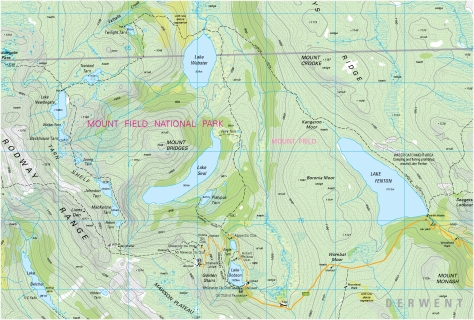
Over the weekend of 15-17 April, 2016 I teamed up with three other like minded ladies and off we went to Lake Dobson, in Mt Field National Park, southern Tasmania, on a Fagus chase.

Fagus (Nothofagus gunnii) is a small tree, usually growing up to 2 metres. It is Tasmania’s only deciduous tree, and has a superb autumn display.

Best known as fagus, the deciduous beech turns a spectacular range of autumn colours, from rust red through to brilliant gold, during late April and May.


donson topo map area
Section of the Dobson (g4627) topographic map (1:25,000) covering the area visited

On Friday 15 April two os us set off to spend two nights at the Government Huts on the Lake Dobson Rd (bottom centre on the map) and the other two ladies joined us on Saturday morning.  We travelled via new Norfolk – spying many Targa Tasmania cars along the way – with a spot of hawthorn berry and rosehip foraging at Plenty, arriving at the visitor centre at noon.  After collecting our key, we trekked up the snakey Lake Dobson Rd, in good condition from recent grading, to the Huts.

On arrival Dawn and I decided to check out the Snowgum track which leads up to the top of the range and the Tarn Shelf.  My HEMA map described it in a way that made it sound like an easy stroll.  NOT SO!

I had, fortunately, had the foresight to put out a call to the Southern Tasmania Ski Association to ask if anyone was going up that weekend so I could, hopefully, access the locked gate and drive up to the ski huts – saving us a few kms up and return, as I have walking problems over long distances and rough ground (more on that later).

Bishwa Oakes and Ambrose Canning responded magnificently – thank you people – and I thus had a Jeep Track key.  After dumping our great in the Fagus Hut, we drove up Lake Dobson parking area and on through said gate to the Mt Mawson Ski Hut – the van then decided it didn’t like the gravelly corner and that was as far as it was taking us, thanks very much!  We thought, no drama, there is the Snowgum track almost adjacent, so off we went.

Now please bear in mind, I am 62, reasonably fit but with an arthritic ankle (25+ yr old never diagnosed break) and Dawn is a few years younger but not super fit either.  The things I had read and the people I had asked said we’d be fine if we went slowly.  Well, there wasn’t much choice on that score, as the track turned out to be a boulder scree with barely a patch of flat track or earth until we got to the lookout.  I was really, really glad I had my sturdy hiking staff.

This is the track looking down from the lookout, so do bear in mind what I said earlier about problems on rough ground!, and the view of Lake Seal from up there, plus one across from the lookout (marked on the map) to the area of the Tarn Shelf to the right of the day shelter.  It was magnificent!

However, we were rather knackered and it was starting to come over very windy and sprinting, and we just wanted to get down.  There was supposed to be an easier track, going back to the top of the section of road we had not been able to drive up, going off from the lookout.  We cast around for a while trying to find this track, but no luck,  We found an area of duck boarding but it ended in what, to us, looked like an impassable boulder field.  As it was now after 4pm we just headed back the way we had come, and arrived back at the car sore and tired.  Some of the large rocks I’d scrambled up on the way up had to be negotiated by sitting on the edge and dropping over!

The booklet on the huts and area thankfully informed us the Fagus was usually good around lake fenton, a nice FLAT access just a couple of kms back down the lake Dobson road.  So with en expedition there planned for the morning, it was dinner, a glass of wine and an early night, in a hut that was beautifully warm from the wood fire stove.

Saturday 16 April

A lovely morning, despite light rain, and a small explore round the area of the huts after Gwenda and Sharon arrived.  We saw possum, wombat and wallaby scats – and some from the more invasive and undesirable species of US (shame on you visitors), plus some unmentionable rubbish which I put in out rubbish bag – but apart from those small blast it was lovely.

The only drawback at the Huts is having to walk to the deep drop composting loos, but it’s not far and better than none!

We set off for Lake Fenton round 9.30, in drizzly rain and quite gusty wind.  It’s just a 5 minute drive back eastwards, and we parked near the gate.  The fagus area is right at the gate, very convenient, and suitable to take quite small children to.  But close access does require, again, rock scrambling!

We saw all colours of fagus here, from green to dark red.  The leaves of the tree are very small, I have included one with my fingers in them to give an idea of scale.

After getting out fagus fill, we explored the small area around between the entry to the lake and the road, to the east, which includes the outlet for the water flow and the old lake Fenton Hut (simply marked as ‘hut’ on the map) built in the 1920s by Bill Belcher, appointed the first ranger of Mt Field National Park in 1917.

We saw a lot of different types of vegetation and fungi.  There us a very great diversity up here, and it’s a fabulous area to visit.

From here we walked back to the dam wall area, where I saw a plant I’d never seen before, which I think is Mountain rocket, Bellendena montana, although the sources say it flowers from December to January, so I am still not sure.  It was growing near the lake wall in a disturbed area of ground by a fence.

DSCF1773

After the explorations dawn and I decided on a rest, and the others went to have an explore over Wombat Moor towards the south along the walking track – a somewhat wet and muddy decision, as it turned out!

After a cup of delicious hot soup and a bit of a rest, we  wandered around for a few shots round the huts, and when the other ladies returned organised dinner and a good chat round the fire.

Sunday 17 April.

I was up about 6am, and caught a very brief and pretty sunrise with pink clouds and some mist rising from the higher slopes.

After packing the vehicles, we set off, Gwenda and Sharon for the Tarn Shelf circuit – well done ladies, a truly epic achievement – and dawn and I for a rather more sedate explore round the foot of lake Dobson, close to the car park. The water its amazingly clear and there is a lot of fallen timber beneath the surface.  And wombats really do do square poo!

After that, we headed home, with frequent stops for fungi shots at the Woodland walk and by the sides of the road.

Last stop was the Visitor Centre to drop off the key.

And a good time was had by all, despite some of us not actually reaching the Tarn Shelf.


Garlic, garlic and lots of fun at the Koonya Garlic Festival!

I haven’t been getting out enough lately with the camera, due to being ‘busy, busy, busy’ and lately, to a broken wrist which restricted me from driving.  But had the pesky plaster off on Monday, so yesterday we trotted off to the Tasman Peninsula  for the third annual Koonya Garlic Festival – described as “a one day celebration of garlic through community produce, food & drink, music and educational talks.  This is THE PLACE to trade or buy garlic, garlic breath or garlic tales.”

All images with Fuji X-T1 and XC 18-55 f2.8 lens

Held at the lovely grounds round the Community Hall and Bushfire Brigade shed, it’s a real fun outing.  At just a gold coin donation to the local SES for entry, it’s a bargain.

We even got a couple of bags of sheep poo for OUR garlic bed, ready for autumn planting.  We finally have our shit together!

Included on the program of events are talks, tastings, cooking demos and fun activities for the kids such as a garlic and spoon race and a garlic pinyata.

There’s also a garlic competition with prizes in the hard and soft neck varieties.

And lots of lovely Tasmanian food, wine and other goodies on show.

And if you got tired, well there is always the grass for that quick ‘revive me’ nap we all sometimes need during a long day out

DSCF1345

Recommend the festival to anyone who likes garlic, fine food, good produce and a fun day out.

Using the dehaze feature in Adobe Camera raw.

I hadn’t realised we had this feature in ACR, until someone mentioned it on FaceBook.

So I’ve been having a go at it for some of the shots the from the big auroral storm (coronal hole) of 7-8 October 2015.

This is the finished image.

2251-DSCF0350+C

First, the straight from the camera raw file, opened in Adobe camera raw for Editing

Screen Shot 2015-10-14 at 10.57.38

Then I went to the Fx tab and added in 100 dehaze

Straight from the camera and opened in Adobe camera Raw

Next, I went back to the overview tab (leftmost) and dialled in some adjustments as shown here

Screen Shot 2015-10-14 at 10.57.29

And, after a few minor tweaks in Photoshop itself – the result

Screen Shot 2015-10-14 at 11.47.46

The American Solar Eclipse, 21 August 2017

Well, wouldn’t I love to visit the US for this. I can dream, you understand, to do it in reality is probably out of my financial reach.

I could start up in Washington where Warwick has relatives, hire a camper van, drive down to SC (Hello Scott Mitchell) where totality is, then I’d love to wind my way up via Denver at least (always wanted to see it) to Seattle (Hello Maribeth Culpepper), turn in camper van, maybe squeeze in some visiting in Canada and fly home.
I sure wouldn’t be able to see everything but there has to be some nice scenery along the way.
I will start looking into what I can sell. My body won’t do it, all those 5cent bits would weigh too much on the plane.

See the EclipseWise page for all about the eclipse and an interactive map

So, where are all my US friends located?  Working from north to south and east to west.

Jessica Lear Russell is in Maine.

Warwick’s rellies are near Washington

Scott Mitchell is in Georgia

The eclipse is not too far from him, totality in Tennessee is not far to the north – by our Aussie standards of distance, anyway. I am looking at small places, Spring City looks well located as does Sweetwater, Tellico Plains and Andrews – all on or close to the line of totality.  I’d plan to get to the area a couple of days before and suss out the best spot.  The map below shows possible places – the green GE marker is Greatest Eclipse, the red ones are the general area I’d consider.  I will avoid that as many people go there to try and get ‘perfect’ oval shapes for the eclipse sun, I’m not that fussy and quieter sots are best, IMHO!

The map showing sites I'd like to check out IF i
The map showing sites I’d like to check out IF i

It’s a pity it falls right in summer, accommodation wise, but good weather wise.  It looks as though most Tennessee schools are back by mid-August, though, that’s a relief.

Maribeth Culpepper is way over the other side in Seattle – I plan to end up there, but it could turn round and start put there.  Will depend on fares etc and, of course, finances overall.

The ole buckaroos are the big problem, naturally, as they are to us all,  We’re on a fixed income, so I’ll have to devise some means of money making.  Any and all suggestions very welcome!

“It’s Been Photoshopped” – or, more properly, Issues Affecting Image Appearance on Electronic Devices.

This article is a response to the familiar cry of “it must have been photoshopped” that we see so often on the social media sites.  There are a huge number of factors  affecting the way we see colours and the image editing software – the digital darkroom (see my earlier article here) – the artist uses is pretty far down the queue!

And there are a huge range of high end programs such as like Paintshop Pro, Corel, Photoshop, Iridient Developer, Affinity Photo etc.  Many artists don’t use Photoshop per se.  And in the photography field, any artist worth his salt shoots in RAW format which makes the use of a digital darkroom essential.  I’m sure no photographer ever offered raw, undeveloped film to a viewer and said “look at mu terrific image”!  It had to be processed in a (wet) darkroom first.

No two of us see colours in the same way, and while the extreme end of this is colour blindness, there are far more subtle gradations.  My partner sees green as more blue than I do, he’ll call a colour aqua when to me it is clearly green.  No one knows how much individual vision varies as how do you test objectively for it.  Even a machine has to be programmed to recognise things in order to set a benchmark, so it comes back to the person doing the programming.  There is a free colour test here which tests how subtle your colour vision is and it’s an interesting exercise to do, you get better as you retry.

Factor One is the image type.  The identical image will look very different if you line up a screen version, a printed image on paper, one on canvas, and one on with a metallic finish.

Factor Two is colour temperature – both of the image and of the viewing light.  Sunlight or warm artificial light will make something look much warmer and the colours more intense than cool, wintry light.  Things like the type of paper or material an image is presented on can make vast differences.  The hardness of the photographic paper’s grade was one way photographers made their prints differ in the days before digital darkrooms.

Then there are all the factors that affect Image Quality itself – see this Wiki article where there is a good list.

And a few points are solely effective on electronic images.  How many people have ordered items online only yo be unpleasantly surprised to open the package to discover the item they purchased is a different colour to the one shown on the screen?

Which brings us to Factor Three, monitor type and quality.

We’ve all been to an electronics shop with rows of televisions or computer monitors, all displaying ‘identical’ images.  But as you look down the rows, the colors can be noticeably different, in tone, light/dark and clarity.

Computer monitors will show different colours if hooked up to computers with different video cards.

Screens contain phosphors which cause colours to change as the screen gets older. They also have varying ability to display colours with some showing many more tones. Resolution also affects the color issue because higher resolution means clearer and more accurate images.

The easiest way to fix this problem is to calibrate monitors to display more accurately.  All monitors should be calibrated, BUT – remember the eyesight of the person calibrating will affect the result, along with the light of the room where they are doing it, and screens change over time and they need to be re-calibrated on an occasional basis for the best results.

And Factor Four is the artist’s bugbear –  image compression.  A typical image from a high end digital camera, when processed in a high end program is large, they can easily go 17 to 15 Mb.  That’s far too large to go on the web so the file will be saved in a lossy format file such as jpeg, and made smaller both in size and resolution so it can be posted on the internet.  Then programs like FaceBook do their own compression on the image, over which the artist has NO control whatsoever, and often, this final compression will make an image look very different indeed to the original.

So please don’t be so quick next time with the “it’s been photoshopped” mantra – have a think about the processes involved and ask the original poster what’s been done.

Straight out of Camera versus Editing in the digital darkroom

In the last couple of years I’ve seen a lot on Facebbok and various forums regarding straight out of camera (SOOC) images and their merits as opposed to images that have been adjusted in a digital package (such as Lightroon, Photoshop, etc).  The SOOC folk seem to think there are some great merits to not having ‘done anything’ to their images, which means they have, in their not so humble opinions, got it ‘right’ in camera.  There are even Facebook groups devoted to SOOC images!

What many of them overlook is the fact that those jpegs they’re posting (they’re always jpegs as otherwise they’ve processed them) HAVE been processed – by the in camera algorithm of the company that makes the camera.

My take on editing treats digital ‘straight out of camera’ (SOOC) images I treat as negatives.  When I shot film (and I shot film for around 50 years) I wouldn’t show the negatives to someone and ask them didn’t they think it was a great shot.  I’d print it, or get it printed.  A process involves a lot of decisions and does involve editing.

So I don’t think the much touted ‘SOOC’ has any great merits.  I prefer to shoot raw (I always shoot Raw or Raw + Jpeg) and edit in my digital darkroom.  I do like to get it as ‘right’ as I can, so the editing I have to do is minimal, but I have absolutely no problem in adjusting colour balance, saturation, brightness and contrast in my digital darkroom – those are things we did in the wet darkroom, too.  Colour balance was achieved by the inserting of filters into the enlarger head, saturation and brightness by the timing of the exposure in the enlarger, and the enlarging lens settings, and contrast the grade of paper chosen, soft to hard. So there is no way a print from a negative is straight out of camera.

Here’s a recent image – the SOOC jpeg and the raw edited to bring it up to a better result.  I’ve only done exactly what I would have done in the darkroom – lightened the shadows a bit (done by dodging and burning in the wet darkroom), and adjusting white balance and levels.  SOOC is on the right – and it’s certainly a usable image, but the edited version on the left is far better.  You can see the settings I used in ACR (Adobe Camera Raw) before opening in Photoshop and resizing to ‘print’ standard for the web.  As I only managed 2 frames of this bird before he flew off, I didn’t have time for a lot of in camera adjustments.  This is the strength of digital, we can save much more marginal images than was possible in film.

Bird Shot Comparison

I love digital.  I embraced it as early as I was able to afford it, and love the freedom it gives me to shoot as many angles and exposure combinations as I desire of a chosen subject.  The very fact that I DON’T have to make such critical decisions on the fly and in the field are, to me, digital’s huge strength and advantage.  Why limit yourself when it is not necessary?

And in digital you can make these fine adjustments yourself, so the result reflects YOUR taste and vision, not that of a technician in a photo lab somewhere.  No matter how good a photo lab, what they duo is filtered through your instructions of what you want to achieve and their interpretation of those instructions.  It introduces levels of misunderstanding that don’t happen when you do the work yourself.

In the film days, not may people had access to, or the high level skills to use, the resources of a full colour wet lab.  So we were reliant on the skills of this technicians,  I know I suffered some disappointments in when what I envisaged came back from the lab, and the results were somewhat short, and often very different.  Indeed, some of those images I have had scanned and adjusted in the digital darkroom, and I like my results much better.

So, for me, it’s digital all the way, and I embrace the width and depth of the editing possibilities available.  I even like to do montages, although I always state that they are composed using more than one frame, and I call them images, rather than photos.  And yes, you could do those in your wet darkroom too, although it took a lot of skills and a painstaking level of fine finagling to get them right.  Digital is MUCH easier!

Naturally, not everyone will agree, that’s what makes our photography such an interesting job/hobby/past-time.

My thoughts on my photography and what I'm doing, photographically.